Flat the Mountain Drones & Turrets
Build the automation layer that keeps mining while you chase chests and dodge eagles.
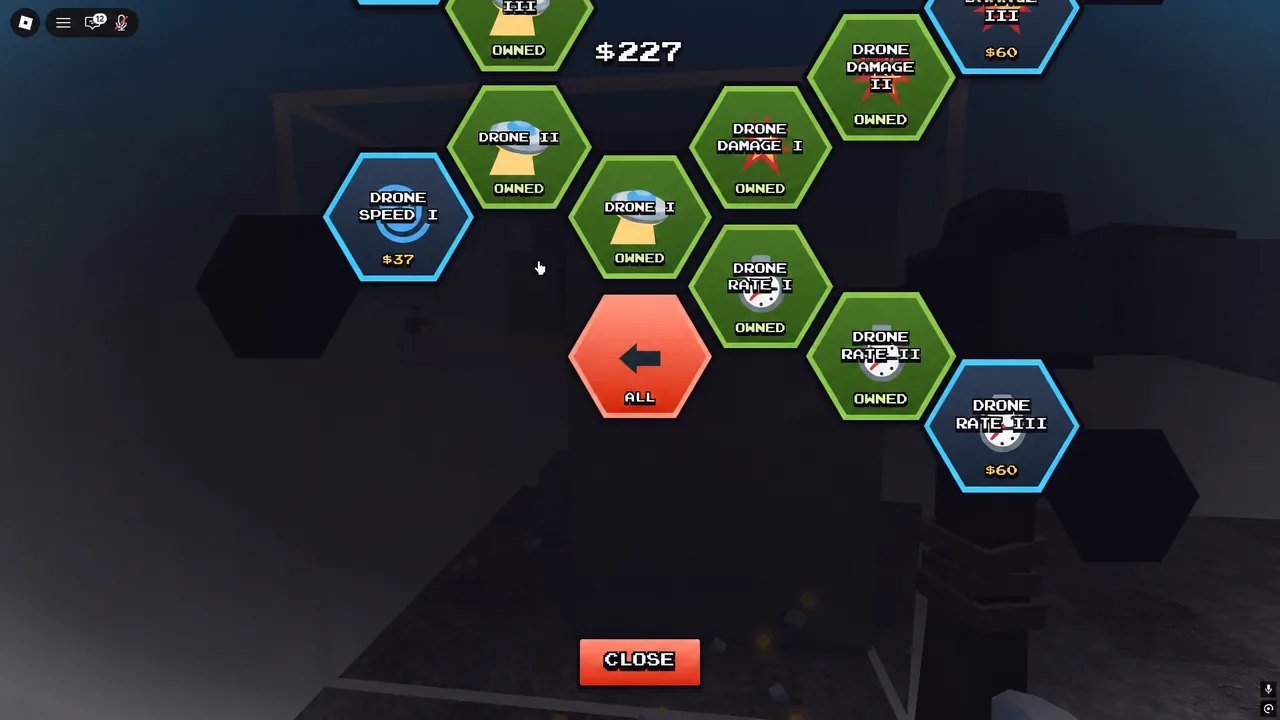
Drones and turrets turn Flatten The Mountain from a click marathon into a managed incremental. DomBlox Games expects you to spend early cash on helpers that chew stone while you solve gems, ores, and eagle positioning. This guide covers buy order, how automation fits the mining loop, when to stop dumping dollars into one turret, and how THE MOON IS OPEN adds extra turrets/drones plus late-game bombs, drills, and splash tools.
Why automation exists
The mountain is about 89 layers, 534 m, and ~9400 blocks. No human enjoys manually authorizing every break. Drones act like mobile miner familiars; turrets act like anchored clearers. Together with Auto Mine (~$200) they free your eyes for Diamond (+$320) veins, buried chests, and EAGLE INCOMING! warnings.
Early purchase ladder
Mirror the upgrade spend priority:
- Damage I ($1) — personal swing still matters.
- Drone I ($5) — first parallel damage.
- Turret I (~$23) — second automation axis.
- Alternate drone/turret levels as cash arrives.
- Bank for Auto Mine (~$200).
- Resume balanced drone/turret investment plus productive skills.
Skipping turrets to “rush Auto Mine” sometimes works for hyper-focused Solo players, but most beginners clear smoother with Turret I online first (Getting Started).
Drone habits
- Deploy or command drones onto the active deepest layer you care about — idle drones on cleared floors waste the upgrade.
- When you leave for a chest, trust drones to keep filler stone dying.
- During Mining Speed x1.5, personally join the densest cluster while drones cover flanks.
- During 2X Money, make sure drones are not stuck regenerating pathing on already-flat ground.
If a drone seems stuck after an eagle dive, recenter yourself, re-issue commands if the build allows, and continue. Knockback can desync helper pathing even when you survive.
Turret habits
- Place turrets where they see wide horizontal bands of remaining blocks.
- Avoid stacking every turret on one already-melted corner.
- Reposition after a major layer collapse so arcs stay relevant.
- Treat turrets as insurance when you AFK-lean for thirty seconds to open the shop.
Turrets shine in Duo/Trio/Squad (1–4) when one player babysits placement while another chests. In public servers (up to 20) expect visual clutter — still worth buying.
Auto Mine synergy
Auto Mine is the third leg. With all three systems:
- You steer toward high-value ores.
- Drones/turrets delete filler.
- Auto Mine keeps your character productive without click fatigue.
- Attention budget goes to chests and eagle exits (Eagle Survival).
Script users often enable SoftKillz/ALTER Auto Mine on top of the legal upgrade (Scripts Hub). That stacks risk, not wisdom — the fair Auto Mine already transforms the game.
Balancing vs pickaxes
Automation is cash; pickaxes are gems. Own both curves. A Storm Hammer (~396 gems, Thundercall ~5%) with zero drones still loses time to a Lava miner with stacked turrets on deep layers. Conversely, max turrets with Stone equipped is a parody loadout. Climb axes using the Pickaxes guide and the dedicated Storm Hammer page while you level helpers.
Moon update: extra helpers + bombs / drills / splash
THE MOON IS OPEN improves earth upgrade pacing, adds extra turrets/drones, and introduces late-game bombs, drills, splash and more aimed at better endgame clears (Moon update notes, Moon Map). Practical rules:
- Re-check how many drone/turret slots or levels you can fund after the patch — DomBlox explicitly called out extras.
- Keep the early ladder (Damage → Drone → Turret → Auto Mine) intact; new tools are late-game, not day-one replacements.
- Use bombs for stubborn pockets, drills for sustained dense bands, and splash when standing in rich clusters beats single-block tunnels.
- On Moon runs, automation matters even more because the harder sky threat steals personal swing time — helpers must stay productive while you dodge.
- Performance fixes in the same ship target drone/turret hitching; if helpers freeze, relaunch before rebuilding your whole loadout.
Session routine (automation focused)
- Confirm drones/turrets purchased before leaving lobby.
- First minute: plant turrets, launch drones, enable Auto Mine.
- Sweep for power-ups.
- Personally escort Diamond/Ruby.
- Peel for chests every time one is reasonable to reach.
- On eagle warning, leave red zone; verify helpers resume.
- Between layers, spend surplus cash into the weaker of drone vs turret counts.
Troubleshooting low clear speed
| Symptom | Likely cause | Fix |
|---|---|---|
| Cash high, layers slow | Weak pickaxe | Buy next gem axe |
| Clicking constantly | No Auto Mine | Save $200 |
| Helpers idle | Bad placement / cleared floor | Reposition |
| Constant knockback | Ignoring eagle | Practice exits |
| Buffs wasted | Shopping mid-2X | Spend after buff |
Related pages
- Tier List Hub and Upgrades list
- Clear All Layers for timing goals (~51 min first, ~33 min Storm Hammer)
- Moon Map for post-earth automation pressure
- Tools Hub and Controls for input reminders
- Updates Hub / Moon update if DomBlox retunes costs
- Codes Hub — still no confirmed promos as of November 2026, so automation remains the reliable boost
Invest early, reposition often, and let drones/turrets be the quiet teammates that never miss a swing. That is how Flat the Mountain players look AFK while actually running a disciplined machine.
Frequently Asked Questions
Quick answers for Flat the Mountain players.
Should I buy a drone or turret first?
Buy Drone I at $5 first, then Turret I near $23. Level both instead of maxing only one.
Does Auto Mine replace drones?
No. Auto Mine helps your character; drones and turrets add parallel clear power.
What did the Moon update change for helpers?
THE MOON IS OPEN added extra turrets/drones, improved upgrade pacing, late-game bombs/drills/splash, and helper performance fixes.
Why are my turrets doing nothing?
They are probably aimed at already-cleared blocks. Reposition them onto remaining mountain bands.
Can drones dig chests?
Treat chest digging as your job. Automation should keep mining while you secure gems.
Are drones worth it in Squad?
Yes. Even with four players (and servers up to 20), personal drones keep your contribution high when teammates peel away.